Honeywell VisionPro 8000 Thermostat User Manual: A Comprehensive Guide
This manual provides detailed instructions for installing, operating, and troubleshooting the Honeywell VisionPro 8000 series touchscreen programmable thermostat, ensuring optimal performance.

Explore setup, wiring, scheduling, advanced features like Wi-Fi connectivity, and solutions to common issues for a comfortable and efficient home climate.
Refer to model-specific documentation (TH8000, TH8321WF) for precise guidance, alongside warranty details and Honeywell’s customer support resources.

The Honeywell VisionPro 8000 series represents a significant advancement in home comfort technology, offering a user-friendly touchscreen interface and a wide array of programmable features. These thermostats, including models like the TH8000 and TH8321WF, are designed to optimize energy efficiency and provide precise temperature control throughout your home.
This series caters to various heating and cooling systems, encompassing conventional setups, heat pumps, and even millivolt systems. Installation manuals, readily available online (ManualsLib), detail the wiring configurations necessary for seamless integration with your existing HVAC infrastructure.
The VisionPro 8000’s intuitive design simplifies complex tasks, allowing users to easily create customized schedules, adjust settings, and monitor energy usage. Furthermore, Wi-Fi enabled models offer remote access and control via a mobile app, enhancing convenience and flexibility.
Understanding the Touchscreen Interface
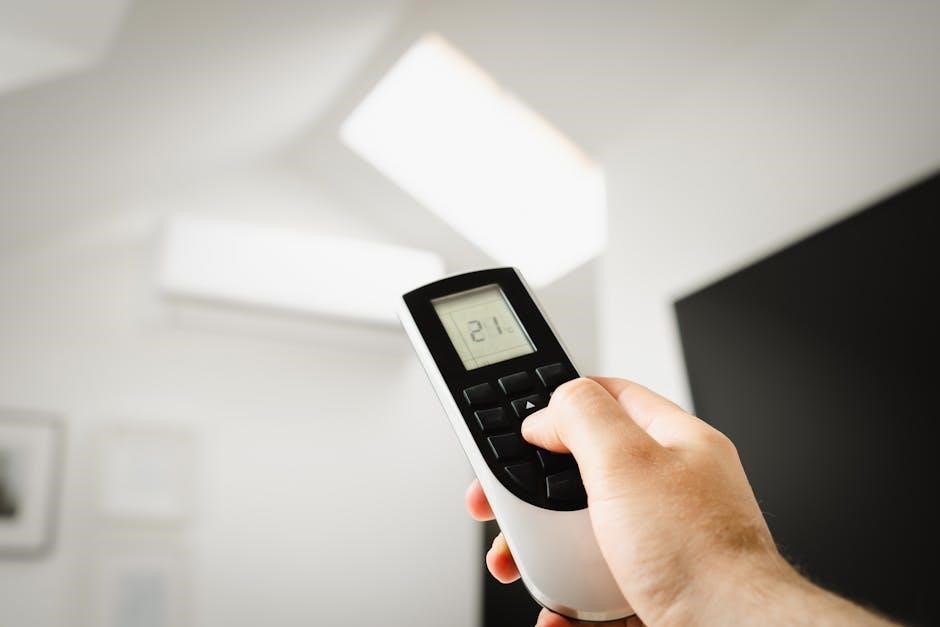
The Honeywell VisionPro 8000 boasts a vibrant, full-color touchscreen designed for intuitive navigation and ease of use. The interface presents key information – current temperature, setpoint, and operating mode – in a clear and concise manner.
Primary functions are accessed through easily identifiable icons, allowing for quick adjustments to temperature, fan settings, and system modes (Heat, Cool, Auto). Swiping gestures enable seamless transitions between different screens and menus.
The touchscreen responds to a gentle touch, eliminating the need for excessive pressure. Users can customize display preferences, such as brightness and screen timeout, to optimize visibility and conserve energy. Detailed operating manuals (available on ManualsLib) provide visual guides to each screen and function.
Initial Setup and Powering On
Before installation, ensure the HVAC system is powered off at the breaker to prevent electrical shock. Carefully follow the wiring diagrams (detailed in installation manuals found on ManualsLib) to connect the thermostat to your system’s wiring.
Once wired correctly, restore power to the HVAC system. The VisionPro 8000 should power on automatically, displaying the Honeywell welcome screen. If it doesn’t, double-check all wiring connections and the breaker status.
The initial setup wizard will guide you through essential configurations, including date, time, and system type. Registering your thermostat (as suggested in user manuals) unlocks access to additional features and support resources.
Wiring Diagrams and Compatibility
The VisionPro 8000 series supports various HVAC systems, but proper wiring is crucial for correct operation. Refer to the installation manual (available on ManualsLib) for detailed wiring diagrams specific to your system type – conventional heating/cooling, heat pump, or millivolt systems.
Carefully identify each wire from your existing thermostat and connect it to the corresponding terminal on the VisionPro 8000’s backplate. Incorrect wiring can damage the thermostat or your HVAC equipment.
Compatibility varies; ensure your system meets the thermostat’s voltage requirements. Consult Honeywell’s documentation or customer support if unsure about compatibility before proceeding with installation.
Conventional Heating and Cooling Systems
For standard heating and cooling setups, the VisionPro 8000 typically utilizes five wires: Rh (heating power), Rc (cooling power), W (heating), Y (cooling), and C (common). The ‘C’ wire is often essential for consistent power and Wi-Fi functionality.
Carefully match the wire labels from your existing thermostat to the corresponding terminals on the VisionPro 8000’s backplate. If a ‘C’ wire isn’t present, a ‘C-wire adapter’ may be necessary – consult the installation manual or a qualified HVAC technician.
Double-check all connections before powering on the system. Incorrect wiring can lead to malfunctions or damage. Refer to the detailed wiring diagrams in the Honeywell installation guide (ManualsLib) for visual assistance.
Heat Pump Systems Wiring

Wiring a VisionPro 8000 to a heat pump differs from conventional systems, often requiring six or more wires. Key terminals include Rh, Rc, Y (compressor), W1 (auxiliary/emergency heat), W2 (primary heat), and C (common). An O/B terminal controls reversing valve operation for heating/cooling changeover.
Proper identification of O/B wiring is crucial; incorrect configuration can result in reversed heating and cooling. The installation manual (ManualsLib) provides specific diagrams for various heat pump configurations.
Ensure the correct dip switch settings are configured within the thermostat to match your heat pump type. A ‘C’ wire is highly recommended for reliable operation, especially with Wi-Fi models. Always power off the system before making any wiring changes.
Millivolt Systems Configuration
Configuring the VisionPro 8000 for millivolt systems, commonly found with fireplaces or wall furnaces, requires a unique approach. Unlike line-voltage systems, millivolt setups operate on very low voltage generated by a pilot light or electronic ignition.
The thermostat connects to the system using wires for the gas valve and a common wire. Do not connect a ‘C’ wire to a standard millivolt system, as it can damage the control board. The VisionPro 8000 must be set to millivolt mode within the settings menu.
Refer to the installation manual for specific wiring diagrams and dip switch configurations. Proper setup ensures accurate temperature control and safe operation of your millivolt heating appliance.
Programming Basic Settings
Initial thermostat setup involves configuring fundamental settings for accurate operation. Begin by accessing the settings menu via the touchscreen interface. This allows customization to match your specific heating and cooling needs.
Essential settings include setting the current date and time, ensuring schedules function correctly. Next, define your system type – selecting between Heat, Cool, or Auto modes dictates how the thermostat controls your HVAC equipment.
Finally, choose your preferred temperature scale; the VisionPro 8000 supports both Fahrenheit and Celsius. These basic settings form the foundation for personalized comfort and efficient energy management.
Setting the Date and Time
Accurate date and time settings are crucial for proper scheduling and operation of your Honeywell VisionPro 8000 thermostat. Access the settings menu through the touchscreen, navigating to the ‘Date & Time’ option.
You’ll typically be presented with separate fields for month, day, and year. Use the up and down arrows, or direct numerical input, to set the correct date. Similarly, adjust the hour and minute to reflect the current time.
Confirm your selections; the thermostat will then utilize this information for all scheduled events and time-based functions. Incorrect settings can lead to scheduling errors, so double-check for accuracy.
Configuring System Type (Heat, Cool, Auto)
Proper system type configuration is essential for the VisionPro 8000 to control your heating and cooling effectively. Access the ‘System Type’ setting within the thermostat’s menu, usually found under ‘Configuration’ or ‘Settings.’
Select from options like ‘Heat Only,’ ‘Cool Only,’ or ‘Auto.’ ‘Heat Only’ is for systems with heating alone, ‘Cool Only’ for cooling only, and ‘Auto’ allows the thermostat to switch between heating and cooling based on setpoints.
For heat pump systems, a specific heat pump configuration option will be available. Ensure the correct selection is made to optimize performance and efficiency. Incorrect settings can result in improper operation and discomfort.
Temperature Scale Selection (Fahrenheit/Celsius)
The Honeywell VisionPro 8000 allows users to display temperatures in either Fahrenheit (°F) or Celsius (°C) to suit their preference. This setting is typically located within the thermostat’s ‘Configuration’ or ‘Settings’ menu.
Navigate to the ‘Temperature Scale’ option and select your desired unit of measurement. The thermostat will immediately update all temperature displays to reflect the chosen scale.
This is a simple customization that enhances user experience and readability. Remember that changing the scale does not affect the thermostat’s operational functionality; it only alters the displayed values. Ensure consistency with your local climate reporting and personal comfort.
Creating and Editing Schedules

The VisionPro 8000’s scheduling feature enables automated temperature control, optimizing comfort and energy savings. Access the ‘Schedule’ menu to create customized heating and cooling programs. You can define different temperature settings for various periods throughout the day.
Typical schedule periods include ‘Wake,’ ‘Leave,’ ‘Return,’ and ‘Sleep,’ but these can often be customized. Set desired temperatures for each period, tailoring the schedule to your daily routine. The thermostat supports unique schedules for each day of the week.
Editing is straightforward; simply select the period and adjust the temperature or time. Copying schedules to multiple days streamlines the setup process, ensuring consistent comfort throughout the week.
Understanding Schedule Periods (Wake, Leave, Return, Sleep)
The VisionPro 8000 utilizes four primary schedule periods to automate temperature adjustments: ‘Wake,’ ‘Leave,’ ‘Return,’ and ‘Sleep.’ The ‘Wake’ period sets the temperature for when you typically rise, providing immediate comfort. ‘Leave’ lowers the temperature while you’re away, conserving energy.
The ‘Return’ period adjusts the temperature before you arrive home, ensuring a welcoming environment. Finally, ‘Sleep’ sets a cooler temperature for nighttime, promoting restful sleep and further energy savings.
Each period is defined by a start time and temperature. You can customize these settings to perfectly match your lifestyle. Adjusting these periods allows for a personalized and efficient heating and cooling schedule.
Setting Different Temperatures for Each Period
The VisionPro 8000 allows precise temperature control for each schedule period – Wake, Leave, Return, and Sleep. Access the scheduling menu and select the period you wish to modify. Use the touchscreen interface to input your desired temperature setting for that specific time.
Consider your comfort and energy-saving goals when setting temperatures. A warmer ‘Wake’ temperature, a cooler ‘Sleep’ temperature, and energy-efficient settings for ‘Leave’ and ‘Return’ are recommended.
The thermostat remembers these settings and automatically adjusts the temperature according to your programmed schedule, maximizing comfort and minimizing energy consumption. Experiment to find the ideal temperatures for each period.
Copying Schedules to Multiple Days
The VisionPro 8000 simplifies schedule management with a convenient copy function. After creating a schedule for one day, you can easily replicate it to other days of the week. Access the schedule settings and locate the “Copy Schedule” option.
Select the source day (the day with the schedule you want to copy) and then choose the destination days. You can select individual days or use options like “Weekdays” or “Weekend” for faster application.
This feature saves time and ensures consistency across your weekly heating and cooling plan. Verify the copied schedules on the destination days to confirm accurate settings.
Advanced Features and Settings
The Honeywell VisionPro 8000 offers a range of advanced features to optimize your home comfort and energy savings. Wi-Fi connectivity (available on TH8321WF models) enables remote control and monitoring via a mobile app.
Remote access allows you to adjust temperatures, view system status, and receive alerts from anywhere with an internet connection. Smart Learning adapts to your preferences over time, automatically creating a personalized schedule.
Geofencing capabilities utilize your smartphone’s location to adjust the thermostat when you leave or return home, maximizing efficiency. Explore these settings within the thermostat’s menu for a truly customized experience.
Wi-Fi Connectivity and Setup (TH8321WF Models)
The TH8321WF model boasts integrated Wi-Fi, enabling remote control and monitoring. To connect, access the thermostat’s settings menu and navigate to the network configuration section. Select your home Wi-Fi network from the available list and enter your password.
Ensure a strong and stable Wi-Fi signal for optimal performance. The thermostat will display a confirmation message upon successful connection. Once connected, download the Honeywell Home mobile app to access remote control features.
Troubleshooting tips include verifying your network password and restarting both the thermostat and your router if connection issues arise. Refer to the app’s help section for further assistance.

Remote Access and Mobile App Control
The Honeywell Home mobile app unlocks convenient remote access to your VisionPro 8000 thermostat. Download the app (available for iOS and Android) and create an account. Follow the in-app instructions to pair your thermostat with your account.
Once paired, you can adjust temperature settings, create and edit schedules, and monitor energy usage from anywhere with an internet connection. Receive alerts for extreme temperatures or system malfunctions. The app provides a user-friendly interface for complete control.
Explore features like geofencing, which automatically adjusts the temperature based on your location. Ensure your thermostat remains connected to Wi-Fi for seamless remote operation.
Smart Learning and Geofencing Capabilities
The VisionPro 8000 boasts smart learning, adapting to your heating and cooling preferences over time. It analyzes your schedule and temperature adjustments to optimize energy efficiency and comfort. This feature minimizes manual programming, creating a personalized climate control experience.
Geofencing utilizes your smartphone’s location to automatically adjust the thermostat. As you leave a predefined area, the system can switch to an energy-saving mode. Upon returning, it restores your preferred temperature settings. Configure geofencing through the Honeywell Home app.
These intelligent features enhance convenience and reduce energy consumption, providing a smarter, more responsive home climate control system.
Troubleshooting Common Issues

If the thermostat fails to power on, check the circuit breaker and wiring connections. Ensure the C-wire is properly connected, as it’s crucial for consistent power. Incorrect temperature readings may indicate a faulty sensor or improper thermostat placement; recalibrate or relocate if needed.
Connectivity problems with Wi-Fi models (TH8321WF) often stem from network issues. Verify your router is functioning correctly and the thermostat is within range. Restart both the thermostat and router. Consult the Honeywell Home app for troubleshooting steps.
For persistent issues, refer to the full user manual or contact Honeywell Customer Care for expert assistance. Detailed troubleshooting guides are available online.
Thermostat Not Powering On
If your Honeywell VisionPro 8000 thermostat isn’t powering on, begin by checking the circuit breaker supplying power to the HVAC system. Ensure it hasn’t tripped. Next, carefully inspect the wiring connections at the thermostat and the furnace/air handler. A loose wire can prevent power flow.
Crucially, verify the presence and secure connection of the “C-wire” (common wire). Many VisionPro models require a C-wire for consistent power. If a C-wire isn’t present, a C-wire adapter may be necessary. Consult a qualified HVAC technician for assistance with wiring.
Finally, confirm the thermostat’s batteries (if applicable) are fresh and correctly installed.
Incorrect Temperature Readings
If your Honeywell VisionPro 8000 displays inaccurate temperatures, first ensure the thermostat isn’t directly exposed to sunlight, drafts, or heat-generating appliances. These factors can significantly skew readings. Verify the thermostat is level; an unlevel installation can affect accuracy.
Next, check the thermostat’s location settings. Confirm it’s correctly configured to measure temperature in the intended room. Consider recalibrating the thermostat if discrepancies persist. Some models allow for temperature offset adjustments within the settings menu.
If issues continue, inspect the temperature sensor for any obstructions or damage. Contact Honeywell support or an HVAC professional if recalibration doesn’t resolve the problem.
Connectivity Problems (Wi-Fi Models)
Experiencing Wi-Fi issues with your Honeywell VisionPro 8000 (TH8321WF)? First, confirm your home Wi-Fi network is functioning correctly and has a strong signal strength near the thermostat. Restart both your router and the thermostat – a simple reboot often resolves connectivity glitches.
Ensure you’ve entered the correct Wi-Fi password during setup. Double-check for typos! Verify the thermostat is within range of your router; consider a Wi-Fi extender if the signal is weak. Check for firmware updates within the Honeywell Home app, as these often include connectivity improvements.
If problems persist, consult Honeywell’s online support resources or contact their customer care team for assistance.
Safety Precautions and Warnings
Before installation or servicing, always disconnect power to the heating and cooling system at the breaker box to prevent electrical shock. Incorrect wiring can damage the thermostat or your HVAC equipment – consult a qualified technician if unsure.
Do not expose the thermostat to extreme temperatures, direct sunlight, or moisture. Keep it away from flammable materials. This device is intended for indoor use only. Avoid forceful impact or disassembly, as this could compromise safety features.
Regularly inspect wiring for damage. If you notice any issues, discontinue use and contact a professional. Follow all local electrical codes during installation.
Warranty Information and Support
Honeywell offers a limited warranty on the VisionPro 8000 thermostat, covering defects in materials and workmanship for a specified period from the date of purchase. Retain your proof of purchase for warranty claims. The warranty does not cover damage from improper installation, misuse, or neglect.
For assistance, visit the Honeywell Home website or contact Honeywell Customer Care via phone or online chat. Access frequently asked questions, troubleshooting guides, and downloadable resources. Register your thermostat online to receive updates and exclusive offers.
Further support can be found through authorized Honeywell dealers and installers. Refer to the product documentation for specific warranty terms and contact information.
Leave a Reply
You must be logged in to post a comment.